

What Are the Top Aluminum Solar Rails for Solar Panels?
Choosing the right Aluminum Solar Rails means looking beyond price and advertised load ratings. A rail must match the panel frame, roof attachment, span, and local wind and snow conditions. Check alloy and temper, wall thickness, profile dimensions, finish, and published test data. Then confirm the manufacturer’s installation instructions. A shiny finish alone proves little.
For a practical design perspective, consider this illustrative comment from fictional solar-racking engineer Maya Chen: “A rail is only as reliable as its weakest connection.” This is a sample quotation, not a verified statement from a real expert. The principle still highlights a key comparison: evaluate rails together with clamps, splices, fasteners, and roof mounts. One overlooked splice can affect alignment across an entire row. Small details matter. A slightly heavier rail may offer useful stiffness, but it can also add cost and roof load. There is no universal winner.
This guide compares leading rail options by material, compatibility, load documentation, installation features, and manufacturer support. It also notes where product claims need closer verification. Always check the exact model’s engineering documents and project requirements before choosing. Product names and specifications can change. A careful comparison helps narrow the field, but a qualified designer should confirm the final system for the site.
Understanding Aluminum Solar Rails and Their Role in Panel Mounting
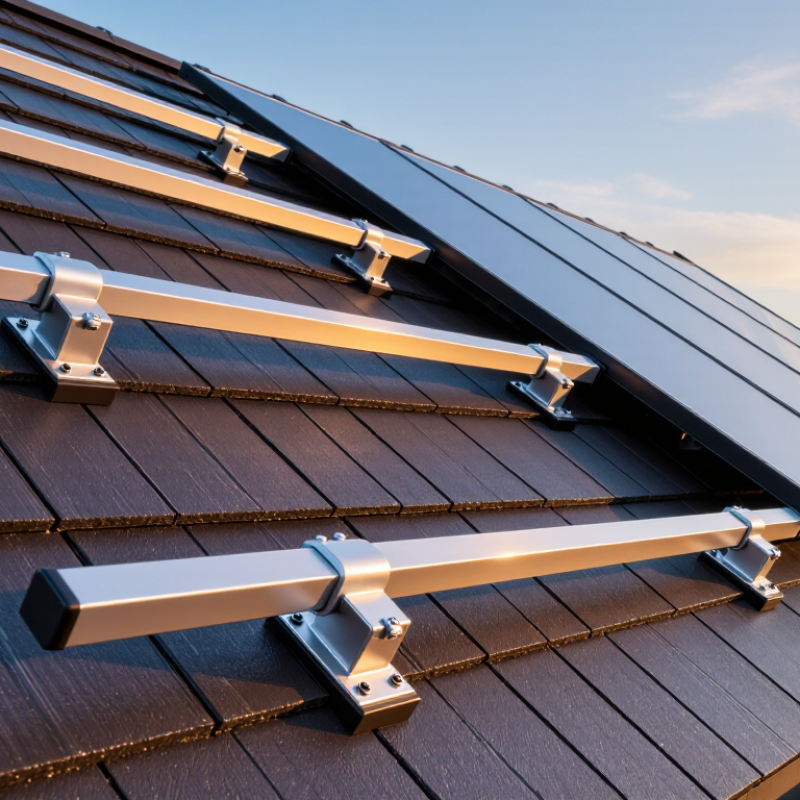
Aluminum solar rails provide the structural path between roof attachments and solar panels. They hold modules in position while transferring wind and weight loads to the supporting structure. Their lightweight construction makes handling easier, but strength still depends on rail shape, material thickness, and support spacing. Small details matter.
During installation, rails are aligned across roof attachments, then panels are secured with mid-clamps and end-clamps. Consistent spacing helps keep panel rows straight and reduces uneven pressure on module frames. Rail compatibility matters, too: clamp dimensions and mounting hardware must match the panel’s approved specifications. A snug fit is not enough.
Roof type and local weather conditions affect rail selection and layout. Installers should check the manufacturer’s load tables and follow project-specific engineering guidance rather than guess at unsupported spans. Aluminum can resist corrosion, yet contact with dissimilar metals may require compatible hardware or isolation measures. Thermal expansion also deserves attention on longer rail runs. Even a neat layout can be wrong if attachment points miss structural framing. This is easy to overlook, and rail choice alone cannot fix weak roof connections. Planning the load path before drilling helps catch problems while adjustments are still simple.
Key Criteria for Comparing Top Solar Rail Systems
Comparing top aluminum solar rail systems starts with structural evidence, not profile size. Check published span tables against the project’s wind and snow loads, roof type, and module layout. A rail that looks rigid can still deflect too much across a wide span. Confirm that test data covers the complete assembly, including clamps, splices, and roof attachments. Fit matters. Alloy and temper also affect strength and corrosion performance, especially near salt air or where dissimilar metals meet. Ask for documented material specifications rather than relying on a product description.
Installation details shape real value. Compare rail weight, cut-to-length options, splice design, drainage, and access to wiring. Then estimate labor and hardware per installed kilowatt, not just rail price. A system with fewer parts may save time, but only if crews can position modules accurately. One trade-off is easy to miss: overly tight spacing can limit adjustment on an uneven roof. It deserves a second look.
Tips: Request load tables for the actual span and support spacing. Check whether clamps fit the module frame, and inspect end cuts for burrs before installation. For embodied impact, the International Aluminium Institute reports that recycled aluminum production uses roughly 5% of the energy required for primary aluminum production. Ask suppliers for recycled-content documentation; the claim alone is not verification.
Common Rail Profiles and Their Structural Differences
Solar rails often use open C- or U-shaped profiles, enclosed box sections, or hat-shaped extrusions. A C-channel is light and easy to clamp, but its open shape can twist under uneven loading. Box sections resist torsion better, though they may add material and complicate fastening. Hat profiles offer a broad mounting face with reinforcing ribs beneath it. Small details matter.
The Aluminum Association’s 2020 Aluminum Design Manual gives aluminum an elastic modulus of about 10,000 ksi (69 GPa). This material property helps explain why rail geometry matters: deeper sections generally resist bending more effectively, while wall thickness and alloy also affect capacity. Compare the manufacturer’s load tables for the actual span, support spacing, and mounting orientation. Wind and snow loads vary by site, so a profile that works on one roof may not suit another. A tidy profile drawing is not a substitute for a span check.
Tips: Check clamp fit, drainage paths, and end clearances before installation. Don’t judge stiffness by appearance alone; verify deflection and load limits in the rail’s engineering data. That step is easy to overlook.
How Rail Systems Suit Different Roofs and Panel Layouts
Aluminum solar rails should match the roof structure, not just the panel dimensions. On asphalt-shingle roofs, attachments typically need to connect securely to rafters and maintain weatherproofing around each penetration. Tile roofs often need carefully positioned hooks or replacement tiles, since uneven surfaces can complicate rail alignment. Small details matter. For standing-seam metal roofs, compatible clamps may avoid roof penetrations, but the seam profile and structural capacity still need checking.
Roof shape also affects panel layout. A simple, open roof may allow long, continuous rail runs, while dormers, hips, vents, and skylights can create short sections and extra joints. On flat roofs, tilted mounting frames may set the panel angle, with rails helping support the modules. Ballasted designs need particular attention to roof load limits and wind exposure. Measure twice. Rail spacing and clamp positions should follow the module manufacturer’s instructions and the project’s structural design.
Panel orientation changes the support pattern: portrait and landscape layouts can require different rail positions or spans. Keep access paths and drainage in mind, rather than filling every available patch with panels. A drawing can look tidy while overlooking a vent or a narrow roof edge. That is an easy mistake to make. A site check, accurate measurements, and confirmation of roof condition help avoid rail cuts, awkward overhangs, and installation changes.
| Rail System Type | Typical Roof Fit | Panel Layout Suitability | Main Advantages | Key Considerations | Common Attachment Approach |
|---|---|---|---|---|---|
| Standard extruded aluminum rail | Pitched composition-shingle roofs and many tile roofs when paired with suitable roof attachments. | Flexible for portrait or landscape layouts; useful when rows need consistent alignment across several attachment points. | Provides a continuous mounting line, accommodates a range of clamp positions, and can help bridge between roof attachment points. | Rail span and attachment spacing must suit the roof structure, local wind and snow loads, and module installation requirements. | Roof flashing or tile-compatible attachments connect to rafters or other approved structural members; rails attach above the roof surface. |
| Lightweight or low-profile aluminum rail | Residential pitched roofs where a compact mounting profile is desirable and the selected system is approved for the site conditions. | Works well for relatively regular, uninterrupted panel rows; layout flexibility depends on the rail’s span and clamp range. | Can reduce mounting-system material and visual height compared with heavier rail profiles. | A lighter profile is not automatically suitable for every roof or load condition; confirm allowable spans and attachment requirements. | Uses roof-specific flashing, brackets, or other approved attachments, with rail sections secured according to the system design. |
| Heavy-duty aluminum rail | Roofs or project locations that require a rail profile designed for higher structural demands, subject to engineering and system limits. | Useful for larger arrays or layouts where attachment spacing and rail spans need careful structural coordination. | A deeper or more substantial profile may provide greater stiffness than a lighter rail of similar design. | Actual capacity depends on rail geometry, alloy, support spacing, connections, and site loads; a heavy-duty label alone does not establish capacity. | Attached to structural roof points using compatible, load-rated roof mounts and fasteners. |
| Shared-rail or common-rail layout | Suitable roof types depend on the compatible attachment system; often used on regular pitched-roof arrays. | Adjacent panel rows or columns may share a rail line where the module and mounting-system instructions allow it. | Can reduce the number of separate rail runs and simplify alignment in compact, repetitive arrays. | Requires compatible module dimensions, clamp zones, and end and mid-clamp arrangements; shared rails are not suitable for every module layout. | Rails are supported by roof attachments placed according to the project’s structural design. |
| Rail system for standing-seam metal roofs | Standing-seam metal roofs where seam-compatible clamps are approved for the roof profile and material. | Accommodates portrait or landscape arrays when rail direction, seam spacing, and panel orientation align. | Seam clamps can attach without penetrating the roof covering when used as specified, helping preserve the roof surface. | Clamp compatibility is specific to seam shape and dimensions; clamp installation must follow the roof and mounting-system requirements. | Seam clamps grip the standing seams; aluminum rails attach to the clamps where a railed configuration is used. |
| Rail system for corrugated or trapezoidal metal roofs | Corrugated or trapezoidal metal roofs with compatible brackets or roof attachments designed for the specific profile. | Best suited to layouts that can follow the roof’s corrugation pattern and available structural support locations. | Profile-matched attachments can provide a stable interface between the roof and aluminum rails. | Attachment choice, sealing, and fastener placement must match the roof profile and structural support; not all brackets fit all sheets. | Profile-specific brackets or mounts secure to the roof structure; rails attach to the mounts above the roof sheet. |
| Tile-roof rail configuration | Concrete or clay tile roofs using attachments designed to work with the tile type and underlying roof structure. | Useful for varied pitched-roof layouts, including arrays where tile courses influence attachment placement. | Rails provide a level mounting plane above an uneven tile surface and allow panel positioning across roof courses. | Tile should not carry the array’s structural load; roof attachments must be properly flashed or otherwise detailed to manage water entry. | Tile hooks or flashed roof attachments connect to structural members; rails mount to the attachments above the tiles. |
Selection note: The suitable rail depends on roof construction, module dimensions and clamp zones, attachment locations, and local wind and snow loads. Verify structural capacity, roof compatibility, and installation details against the applicable project design and product instructions.
Choosing Aluminum Rails for a Solar Installation
Choosing aluminum rails for a solar installation starts with the roof, not the catalog. Rail length and spacing must suit the roof structure and the panel layout. Check the required span against the rail’s load tables, including local wind and snow conditions. A rail that looks sturdy may still flex too much across a wide gap. Fit matters.
Also check panel clamp compatibility, roof attachment points, and grounding requirements. On a tile roof, attachment placement can affect both stability and water protection. On a metal roof, the fasteners must match the roof profile and sealing method. Small details, like end clearances and thermal expansion, can prevent panels from shifting or rails from binding. I sometimes see rail weight treated as the main measure of quality; it is only one factor. A lighter rail is not automatically better, and a heavier one can complicate handling.
Aluminum resists corrosion, but finish and exposure still matter, especially near salty air or industrial pollution. Compare material specifications and installation instructions, rather than relying on appearance alone. Measure the roof carefully before ordering; awkward cuts and leftover sections are common when layouts change. Leave room to reconsider. A practical rail system is one that meets the design loads, fits the roof, and can be installed consistently by the crew.
What Are the Top Aluminum Solar Rails for Solar Panels?
Choosing Aluminum Rails for a Solar Installation
How to read this chart: Higher yield strength indicates greater resistance to permanent deformation, but it does not identify the best rail by itself. Rail profile, span, roof conditions, and local design loads all matter. Values shown are typical minimums for extruded profiles; confirm the applicable alloy, temper, product standard, and thickness before designing an installation.
